Rigging a 3D model for animation is essentially creating a skeleton for that model, so it can be animated within a digital field. It generally involves merging the model together with appropriate joints and restricting certain areas to movement.
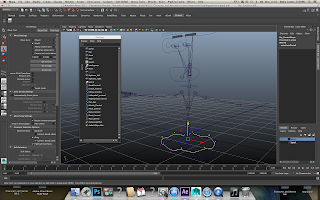
Today I began work on the skeleton of the model,
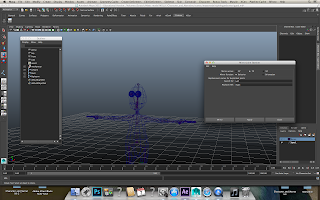 |
| First I set down a basic skeleton complete with joints. Between the joints were placed arrow like tubes, that suggests which joint is the 'parent' joint and which is the child. The direction of the arrow will suggest which joint is the 'parent' to the next. The direction the arrow points to the next joint means that the joint it points, is the 'child' to the 'parent' joint from which the arrow originates from. I set down the skeleton using the 'TOOL'. |
 |
| I set down the skeleton on the left side of the model, then mirrored the rig over to the right side; like I did with the model to save time. I also placed three joints in the spine of the model - the root, the back and the chest. This helps create the illusion of a more 'humanoid' spine rather then keeping to realism and creating at at least 20 joints like the human spine. |
 |
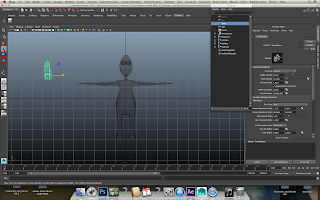
| When setting down the rig that connects to the eye I set the joint to the middle of the eye, with another at the edge pointing out and then attached it to the base of the heads rig (which is parent to the eye joints as well as the mouth, which is located at the base of the chin). |
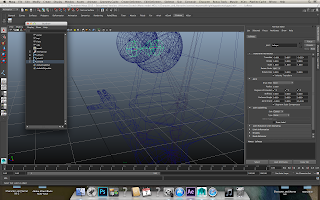
After creating some eyebrows for the model I began working on the controls,
 |
| This step involved me creating circle planes around the rigs 'points' to create controls. Above is a scene shot of the first control I created which is for the heads rotation and tilt. I created this control by connecting the center of the circular plane to the end point of the rig at the top of the head. |
 |
| Continuing with this technique I created the controls for the eyeballs in a similar manner, however this control floats in front of the model. |
 |
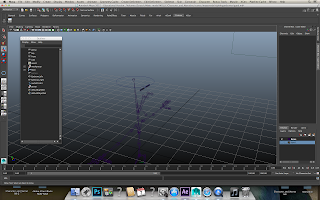
| After created the rig for the eyebrows, the eyes I moved onto the mouth: In which I used the 'TOOL' to sort of 'mold' around the mouth of the model to create it's mold which I then increased in size and floated slightly out from the model. |
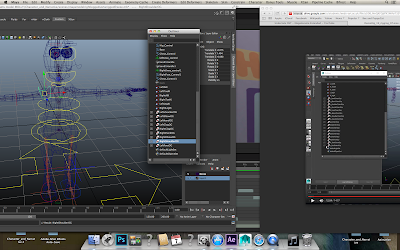 |
| I managed to achieve this for the model after today work, comparing it with my tutors extremely helpful tutorials all along the way of course. After creating all the controls I moved onto creating a system of the controls to work by; this involved creating folders of the controls and putting THAT insider another folder. All of this ended up with the 'Root' being the parent to all over controls. Tomorrow I'll begin binding the rig to the model; I hope I make the deadline! |


No comments:
Post a Comment