After being introduced to model positioning and simplistic key frame animation within the Maya software last week, next I was given the task to model a basic character similar to the model we'd been given to familiarize myself with the software at the beginning - using the two references below:
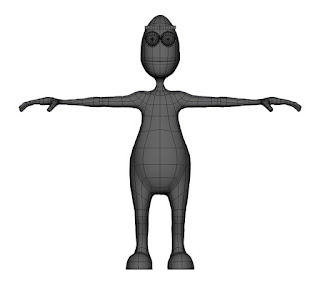 |
| Reference (front) |
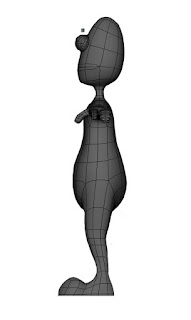 |
| Reference (side) |
I was completely new to the process of character modelling, so this task was entirely foreign to me. I was instantly introduced to all new tools within the software that would help me achieve the desired shapes necessary for this character. 'Extrude' for example was a very useful tool; after creating a basic cube around the pelvis of the character and fashioning gaps within the cube form for the legs to develop from, I could then select the 'edges' of the gaps and drag out the structure. This wouldn't manipulate the entire pelvis structure, but rather just from the 'edges' I had selected, allowing me to build the legs by using the Extrude - Edge tool again and again until a leg was protruding from the pelvis. I was also introduced to the 'Insert Edge Loop Tool'; which basically added on extra 'loops' to the desired area, to allow further manipulation of the structure of the character model or helped give a far more 'smooth' effect to the character model. I had a lot of trouble with Vertexes and Faces to begin with, accidentally crafting them incorrectly and having them cause a problem later on. For instant, I struggled to model the shoulder to begin with because for some reason or another I had accidentally build up more faces around the vertexes then needed when using the extrude tool. To fix this without deleting most of the model I used the 'merge at center tool' - Which would form an object together from selecting several objects, then forming them together at the center.
Below are some screen shots of the finished model;


No comments:
Post a Comment